
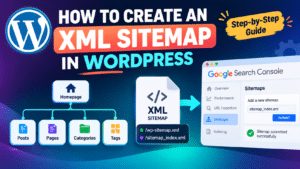
How to Create an XML Sitemap in WordPress (Step-by-Step Guide)
Want search engines to find your important WordPress pages more easily? An XML sitemap is a file that lists the URLs you want search engines to discover. If you use Yoast SEO, it can generate and update the sitemap automatically. This guide shows you how to enable it, find the correct sitemap URL, submit it to Google Search Console, and troubleshoot common problems.
On this page
What Is an XML Sitemap?
An XML sitemap is a file that lists URLs on your website that you want search engines to discover. It can also provide information such as when a page was last meaningfully updated. It is designed for search engines, rather than as a navigation page for website visitors.
A sitemap helps Google discover URLs, especially on larger websites or sites with pages that are not easy to reach through internal links. But submitting a sitemap is only a hint: it does not guarantee that Google will crawl or index every URL in it, and it does not directly improve rankings.
Why Create an XML Sitemap for WordPress?
A sitemap gives search engines a structured list of the canonical URLs you want them to consider. It can be useful when your site is new, has many pages, publishes content regularly, or has pages that are not strongly connected through internal links.
- It helps search engines discover important URLs.
- It provides a convenient way to report sitemap processing errors in Google Search Console.
- It can help search engines notice meaningful content updates when accurate last-modified dates are included.
- It makes it easier to see which content types your SEO plugin includes.
A sitemap does not replace good site navigation or contextual internal links. Make sure important pages are reachable through ordinary links as well as listed in the sitemap.
How to Create an XML Sitemap in WordPress with Yoast SEO
For most WordPress sites, using one sitemap generator is simpler than maintaining a sitemap manually. Yoast SEO can automatically generate XML sitemaps for your content types.
Step 1: Check that Yoast SEO is active
- Sign in to your WordPress dashboard.
- Open Plugins → Installed Plugins.
- Confirm that Yoast SEO is installed and activated.
- If it is not installed, install it from the WordPress plugin directory and activate it.
Step 2: Enable XML sitemaps
Yoast’s menu labels may vary slightly by plugin version. In current versions, look in Yoast SEO → Settings for the site features or content settings and make sure XML sitemaps is enabled. Save any changes.
Some older instructions refer to Yoast SEO → General → Features. If you do not see that exact path, use the settings search or Yoast’s current documentation for your installed version.
Step 3: Open the sitemap from Yoast
In Yoast’s XML sitemap settings, use the option to view the XML sitemap. Yoast commonly serves its sitemap index at:
https://yourdomain.com/sitemap_index.xmlReplace yourdomain.com with your real domain and use the preferred HTTPS and hostname version of your site. Yoast’s sitemap feature is intended to generate and maintain sitemap files for your WordPress content.
How to Find and Check Your WordPress Sitemap URL
Open the sitemap address directly in a browser. If Yoast is generating it, try:
https://yourdomain.com/sitemap_index.xmlA sitemap index usually links to smaller sitemap files, such as post, page, or category sitemaps. Open the index and confirm that it loads and that its child sitemap links work.
WordPress also generates a native sitemap on current installations, commonly at:
https://yourdomain.com/wp-sitemap.xmlIf Yoast is active, use the sitemap Yoast generates as your main sitemap unless you have a specific setup that requires otherwise. Avoid submitting competing sitemap versions without a reason; first decide which generator is authoritative for your site. WordPress core has a built-in sitemap feature, while Yoast provides its own sitemap system.
What a working sitemap should do
- Load without a 404, server error, or security challenge.
- Show XML or a readable sitemap index rather than a normal HTML page.
- Link to child sitemap files that also load successfully.
- List your preferred HTTPS URLs and canonical versions.
- Exclude URLs you do not want search engines to consider, such as private or non-canonical pages.
How to Submit Your Sitemap to Google Search Console
- Open Google Search Console and select the correct property for your website.
- Choose Sitemaps from the left-hand menu.
- Enter the sitemap path, such as
sitemap_index.xml, or enter the full URL if your property setup requires it. - Click Submit.
- Return to the report later and check whether Google could fetch and process it.
Yoast’s instructions also recommend submitting the sitemap in Search Console and checking its processing status there.
Add the Sitemap to robots.txt
You can also include the full sitemap URL in your site’s root robots.txt file. This gives crawlers another way to discover the sitemap. Google supports a sitemap declaration in robots.txt.
Sitemap: https://yourdomain.com/sitemap_index.xmlUse the exact sitemap URL that loads on your site. Do not copy a sample domain or use HTTP if your canonical site uses HTTPS. If you manage robots.txt through Yoast or your hosting file manager, make sure you are editing the version your server actually serves.
For more guidance, read our robots.txt best practices guide and use the Robots.txt Generator if you need to create or review the file.
What Should Be Included in a Sitemap?
Include the canonical, indexable URLs that you want search engines to discover. A sitemap should help clarify your preferred URLs—not list every possible URL your site can generate.
Usually include
- Published pages and posts that are useful and intended for search.
- Canonical versions of important category or product pages, when appropriate.
- URLs that return a successful response and are not blocked from indexing.
Usually exclude or investigate
- Redirecting URLs and URLs that return 404 or server errors.
- Duplicate, parameterized, or non-canonical versions of pages.
- Private, staging, or intentionally noindexed pages.
- Low-value archive pages that you have deliberately set not to index.
Google recommends using fully qualified absolute URLs and including the canonical URLs you want to appear in search results. A sitemap file is limited to 50 MB uncompressed or 50,000 URLs; larger sites need multiple sitemap files and may use a sitemap index.
WordPress XML Sitemap Troubleshooting
The sitemap URL returns a 404
- Confirm Yoast SEO is active and XML sitemaps are enabled.
- Clear your WordPress, server, and CDN caches.
- Go to Settings → Permalinks and click Save Changes without changing the structure.
- Check whether a physical sitemap file or security rule is interfering.
- Try the sitemap again in a private browser window.
The sitemap displays an error or cannot be fetched
- Check whether a firewall, CDN, or security plugin is challenging automated requests.
- Confirm the sitemap and all child sitemaps return successful responses.
- Check that the sitemap URL uses your preferred HTTPS hostname.
- Review the Search Console Sitemaps report for the exact fetch or parsing error.
Google says URLs are not indexed
A sitemap helps Google discover URLs, but it does not guarantee indexing. Inspect the affected page in Search Console and check its indexing status, canonical URL, robots directives, content quality, and internal links. Do not treat sitemap submission as an indexing guarantee.
The sitemap contains URLs you do not want indexed
- Review Yoast’s settings for the relevant post type or taxonomy.
- Check whether the URL is intentionally set to noindex.
- Remove unnecessary content types from the sitemap using the plugin settings.
- Make sure sitemap settings do not conflict with another SEO or sitemap plugin.
XML Sitemap in WordPress: FAQ
Does WordPress create an XML sitemap automatically?
Yes. Modern WordPress installations include a core sitemap, commonly available at /wp-sitemap.xml. SEO plugins such as Yoast can provide their own sitemap system and additional controls. Check which sitemap your site is actually serving before submitting it.
What is the Yoast XML sitemap URL?
It is commonly https://yourdomain.com/sitemap_index.xml. Confirm the exact URL from Yoast’s sitemap settings or by opening it in your browser.
Do I need a sitemap if my WordPress site is small?
A sitemap can still help discovery, but it is not a substitute for internal links or high-quality content. Search engines may discover a small, well-linked site without one, but using the sitemap generated by your CMS or SEO plugin is usually straightforward.
Does submitting a sitemap guarantee that my pages will be indexed?
No. A sitemap is a discovery hint. Google decides whether and when to crawl and index each URL.
Should I submit both the WordPress and Yoast sitemaps?
Usually, choose one primary sitemap system and submit its working sitemap index. If you are unsure which one is active, compare /sitemap_index.xml and /wp-sitemap.xml in your browser and check which one matches your SEO plugin configuration.
Final XML Sitemap Checklist
- Enable XML sitemaps in Yoast SEO.
- Open the sitemap index in a browser and check that it loads.
- Use the canonical HTTPS hostname and URL version.
- Include only canonical URLs you want search engines to discover.
- Add the sitemap URL to robots.txt if appropriate.
- Submit the sitemap in Google Search Console.
- Check Search Console for processing errors and review important URLs individually.
- Keep internal links strong; a sitemap does not replace navigation or contextual links.
Creating an XML sitemap in WordPress is usually a one-time setup: enable it in Yoast, confirm the sitemap URL, and submit it to Search Console. After that, focus on publishing useful content, linking important pages internally, and checking Search Console for actual crawl and indexing issues.
Related Technical SEO Resources
Enjoy this post?
Buy abdelhamid BERRICHI a coffee
